CDN integration is the fastest way to cut website load time, and most website owners have never used it.
Google’s 2023 Page Experience research confirms that 53% of mobile users abandon a page that takes longer than three seconds to load. That is not an estimate. That is a measured, documented behavioral pattern from billions of sessions. If your site loads in four seconds, you are statistically losing more than half your mobile traffic before a single word is read.
Most website owners respond to slow speeds by compressing images or switching WordPress themes. These changes help — but they address symptoms. CDN integration addresses the cause: the physical distance between your server and your visitor.
A content delivery network (CDN) caches your website’s static files. images, CSS, JavaScript, and fonts, on servers positioned around the world. When a visitor loads your site, those files are delivered from the server closest to them, not from your origin hosting server thousands of miles away. The result is a 40% to 70% reduction in page load time, with no code changes and no server migration required.
- CDN integration can reduce website load times by up to 70% by serving content from the nearest server location.
- Faster websites improve SEO performance through better Core Web Vitals and user experience.
- CDNs reduce server load by caching static files such as images, CSS, JavaScript, and fonts.
- CDN integration enhances security with features like DDoS protection, SSL support, and traffic filtering.
- Cloudflare makes CDN setup simple, with most websites able to get started in less than an hour.
- The best results come from combining a CDN with quality hosting, ensuring both fast content delivery and strong server performance.
What Is CDN Integration?
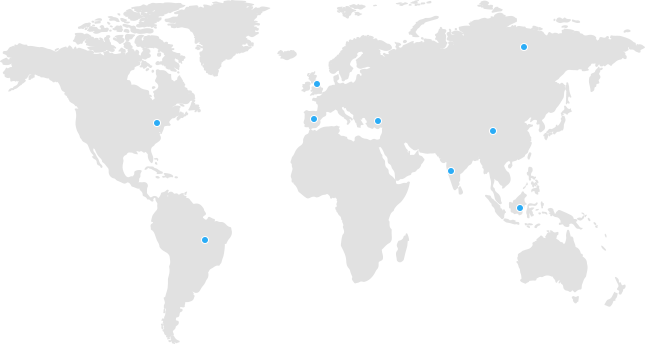
CDN integration is the process of connecting your website to a content delivery network, a distributed system of servers positioned in data centers around the world. When a visitor loads your site, instead of fetching files from your origin server (which might be sitting in Karachi or London), the CDN serves those files from a node that’s physically close to that visitor.
The result? Less distance for data to travel, which means faster load times.
It sounds simple because it is. The complexity is in the setup, not the concept.
How a CDN Differs from Regular Hosting
Your web hosting stores your site’s files and database on a server. It’s the origin, the source of truth. A CDN doesn’t replace that. It mirrors your static assets (images, CSS, JavaScript, fonts, videos) across dozens or hundreds of edge servers globally, then intercepts requests and answers them from whichever server is closest to the user.
Think of it this way: your hosting is the warehouse, and CDN edge nodes are local delivery depots. You don’t close the warehouse. You just stop making every customer drive there themselves.
Why CDN Integration Matters for SEO
Google has used page speed as a ranking signal since 2010. With the rollout of Core Web Vitals in 2021, speed became more measurable and more consequential than ever.
Three Core Web Vitals directly improve with CDN integration:
Largest Contentful Paint (LCP) measures how long it takes for the main content (usually a hero image or headline) to appear. Serving that image from an edge server 20 miles away instead of one 6,000 miles away drops LCP dramatically.
First Input Delay (FID) / Interaction to Next Paint (INP) measures how responsive your page feels. A CDN reduces the time JavaScript files take to load, which directly impacts how quickly the page becomes interactive.
Cumulative Layout Shift (CLS) is less directly affected, but CDN caching ensures fonts and images load in their correct dimensions reliably, reducing unexpected layout jumps.
Beyond Core Web Vitals, there’s another SEO benefit people rarely mention: crawl efficiency. When Googlebot can crawl your pages faster, it can index more of your content in the same crawl budget. Sites with slow servers get fewer pages indexed per crawl.
How CDN Integration Actually Works: The Technical Flow
Here’s what happens when a user visits your CDN-enabled website:
- The user’s browser sends a request for your homepage.
- The DNS resolves to the nearest CDN edge node (not your origin server).
- The CDN checks its cache. If the requested file is cached, it delivers it immediately.
- If the file isn’t cached (a “cache miss”), the CDN fetches it from your origin server, delivers it to the user, and stores a copy for future requests.
- Every subsequent request for that file is served from cache, often in milliseconds.
The first visitor to a specific page after a cache clear will experience a slightly slower load (the cache miss). Everyone after that gets the cached version at full speed.
What Gets Cached vs. What Doesn’t
CDNs cache static assets well: images, CSS files, JavaScript, fonts, PDFs, video files. They don’t cache dynamic content by default, things like your homepage if it shows personalized elements, logged-in dashboard pages, or checkout flows.
This is worth understanding because many people expect a CDN to speed up everything on a dynamic WordPress site equally. It won’t. But for most websites, the majority of page weight comes from static assets, so the gains are still substantial.
Step-by-Step CDN Integration Setup with Cloudflare
Cloudflare is the most widely used CDN, with a free tier that works well for most websites. Here’s how to set it up.
Step 1: Create a Cloudflare Account
Go to cloudflare.com and sign up. On the free plan, you get basic CDN, DDoS protection, and SSL, more than enough to get started.
Step 2: Add Your Domain
After signing up, click “Add a Site” and enter your domain name. Cloudflare will scan your existing DNS records automatically.
Step 3: Update Your Nameservers
Cloudflare will give you two nameservers (something like abe.ns.cloudflare.com). You need to log in to wherever you registered your domain and replace the current nameservers with these.
If you registered your domain through Nexus, you can update nameservers directly from your Nexus client area. DNS propagation usually completes within a few hours, though it can take up to 48 hours in some cases.
Step 4: Configure SSL
Under the SSL/TLS tab in Cloudflare, set your encryption mode. “Full (Strict)” is the recommended setting if your origin server already has a valid SSL certificate installed. If you’re on a Nexus hosting plan, free SSL is included, so you can go straight to Full (Strict).
Step 5: Set Caching Rules
Go to Caching > Configuration and set your caching level to “Standard.” You can also set your Browser Cache TTL here. A setting of 4 hours is reasonable for most sites. If your content changes infrequently, you can push this higher.
For WordPress sites, install a caching plugin (WP Rocket, W3 Total Cache, or LiteSpeed Cache) alongside Cloudflare. The two work together: the plugin handles server-side caching, Cloudflare handles edge caching.
Step 6: Enable Performance Features
Under the Speed tab, turn on:
- Auto Minify for HTML, CSS, and JavaScript
- Brotli compression (more efficient than gzip)
- Rocket Loader (lazy loads JavaScript, though test this carefully on your site as it can occasionally conflict with scripts)
Step 7: Test Your Setup
Use Google PageSpeed Insights or GTmetrix to run before/after comparisons. You should see improvements in TTFB (Time to First Byte) and LCP specifically. Run the test from multiple locations if possible.
CDN Integration with Your Hosting: How They Work Together
A CDN doesn’t replace your hosting, it extends it. Your hosting remains the source of your content. The CDN handles delivery.
At Nexus, our Business Hosting plans include Cloudflare CDN integration built in, meaning you don’t need to set up a separate Cloudflare account or manage nameserver changes manually. The CDN is already working in the background when you sign up. For customers who want to configure advanced rules or use Cloudflare’s additional features (WAF, rate limiting, custom caching rules), you can link your own Cloudflare account on top of that.
The performance combination works because good hosting provides a fast origin, SSD storage, optimized PHP, low server response times, while the CDN ensures that speed reaches users worldwide, regardless of where they’re located.
Pair slow hosting with a CDN and you’ll still have slow cache misses. Pair fast hosting with a CDN and you get consistently fast load times for everyone.
Common CDN Integration Mistakes to Avoid
Caching dynamic pages by accident. If you cache a page that shows a logged-in user’s name in the header, other users might see someone else’s name. Make sure your cache rules exclude pages like /cart, /checkout, /my-account, and /wp-admin.
Not purging cache after updates. When you update your site content, images, or code, the old version might stay cached. Cloudflare has a Purge Cache button under Caching > Configuration. Use it after significant updates or set automatic purging through your caching plugin.
Setting TTL too high for frequently updated content. If your homepage changes daily, a 30-day browser cache TTL means returning visitors see stale content. Match your TTL to how often content actually changes.
Skipping the SSL configuration. Running HTTP instead of HTTPS after enabling Cloudflare can cause mixed content warnings, which hurt both security and SEO. Always verify your SSL is properly configured after setup.
Testing from only one location. CDN performance varies by geography. GTmetrix and Pingdom let you test from multiple global locations. A site that loads in 0.8 seconds from London might load in 2.1 seconds from Sydney if the CDN node coverage is weak there. Cloudflare’s free plan covers most major regions well.
How Much Speed Improvement Can You Actually Expect?
The “up to 70%” figure is real, but it’s the upper end. Here’s a more honest breakdown:
For a site hosted in one country with mostly international traffic, CDN integration can reduce load times by 50% to 70% for users far from the origin server.
For a site with local hosting and local traffic, the improvement is smaller, more like 20% to 40%, because the geographic advantage is less pronounced. But you still benefit from edge caching, which reduces server load and improves TTFB.
For a WordPress site with unoptimized images and no caching, fixing those underlying issues alongside CDN integration will produce much larger gains than CDN alone. CDN is not a substitute for image optimization or good hosting, it multiplies the benefits of both.
FAQs
What is CDN integration in simple terms?
CDN integration connects your website to a network of servers spread around the world. When someone visits your site, files are delivered from the server closest to them rather than from your main hosting server. This reduces the distance data travels and speeds up your site.
Does CDN integration help with SEO?
Yes. CDN integration improves Core Web Vitals scores, particularly LCP and TTFB, which Google uses as ranking signals. Faster load times also reduce bounce rates, which can indirectly improve your search rankings over time.
Is a CDN the same as web hosting?
No. Web hosting stores your website’s files and database. A CDN delivers copies of your static files from multiple locations globally. They work together, you need hosting for your CDN to pull content from.
Can I use a CDN with shared hosting?
Yes. CDN integration works with shared hosting, business hosting, VPS, and dedicated servers. Cloudflare’s free plan is compatible with all hosting types. The main thing that changes is how you configure the integration, not whether it works.
How long does CDN integration take to set up?
For most users, setting up Cloudflare CDN takes between 30 and 60 minutes, mostly waiting for DNS propagation. If you’re using a hosting plan with CDN already included, there’s nothing to set up at all.
Will a CDN protect my site from attacks?
Cloudflare’s CDN includes DDoS protection and basic firewall rules even on the free tier. It won’t block every attack, but it significantly reduces your exposure by filtering traffic before it reaches your origin server.
What is the difference between CDN caching and browser caching?
CDN caching stores copies of your files on edge servers worldwide. Browser caching stores copies on the user’s own device. Both work together, CDN caching speeds up the first load for any given edge node, browser caching speeds up return visits for individual users.
Do I need to purge CDN cache every time I update my site?
Not for every small change, only when you update files that are already cached. For WordPress sites, caching plugins can automate this process. For major updates (new design, plugin changes), manually purge your CDN cache afterward.
Final Thought
CDN integration is one of the most cost-effective performance upgrades available to any website. You’re not rebuilding your stack or migrating to new infrastructure. You’re adding a layer of delivery optimization that your visitors benefit from immediately, usually for free.
The setup takes less than an hour. The performance gains last as long as your site is live.
If you’re already on a hosting plan that includes CDN, the work is mostly done. If you’re not, setting up Cloudflare on top of your existing hosting is the right next step. Either way, checking your Core Web Vitals before and after will show you exactly how much difference it makes.
Published by Nexus Technologies | Pakistan’s trusted hosting and web solutions provider since 1997